Opicron Tutorial
People have been gritching about the interface to Primatic Opticron, so I'll share my design as a tutorial to explain how it works and encourage good artwork. I can't guarantee that this is an exact description of my Opticron because I'm writting this several months after it passed, but hopefully this will explain some things that aren't well documented. For the same reason, you may noticed that the screenshots in design mode are a different location and have just a portion of the design.
Vocabulary
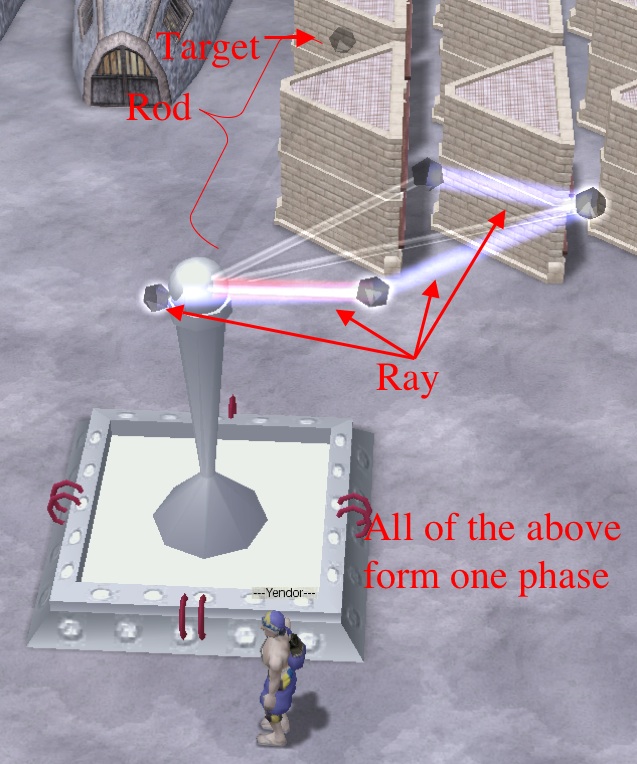
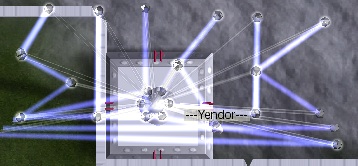
Rays are the rays of light making the artwork. The rays always start at the center base of the opticron. Your Opticron can have up to 22 rays.
Targets are the balls at the end of the translucent rods. Rays travel from target to target, so you will need a target each place the ray stops or changes direction. The Opicron can have up to 22 targets.
Rods connect the targets to the Opticon base. Adjust the rods to reposition the targets.
The Prismatic Opticron is an animated artwork. In film animation, the lead animator creates key frames, showing the signifant parts of the animation, and other artists work on the "tween" frames. Brief example: Key frames might be where a character slips on a banana peel and where the character hits the ground. Tween frames smoothly interpolate the rotation and movement. Opticrons work the same way, except that instead of being called key frames, they are called phases. When designing an opicron, everything put together (location of targets, color and destination of the rays) forms one phase. You can then create a different phase with different settings for the targets and rays, and the Opticron will smoothy animate from phase to phase. A simple Opicron can have up to 22 phases.
In addition to these limits, your Opticron is limted by the equation : phases*(rays+targets)<= 300. So if you have 10 rays and 20 targets, you are allowed only 10 phases.
The Design
(optional section)
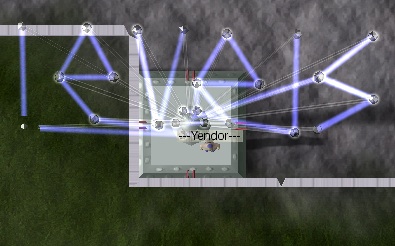
The key idea I had for my Opticon was "Levels Suck!". That is, the word "Levels" should morph into the word "Suck!". So a design with two phases.
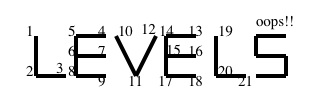
My first attempt on paper used too many targets. So instead of using a block E, I had to conserve targets and make it more angular.
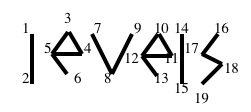
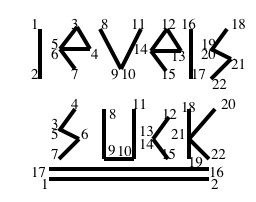
The next step is to match up the targets used in "suck" to the same ones used in "levels". Notice that two letters in "levels" will be leftover. The 's' needs 4 targets, so the 'e' in "levels" can match, skipping the initial 'l'. (once I actually started testing, I had to add another target to get the animation looking good). The 'u' needs 4 targets, but the 'v' gives only 3. Morphing the 'v' into a 'u' made sense to me, so isntead of skipping it, I added a fourth target to the original 'v' (all phases must have the same number of targets, but they are allowed to overlap). Similarly, the four targets of 'e' became a 'c' which really only needed 3, and I added a target to 's' so it could morph into 'k'. I had several choices about what to do with the two 'l's I didn't use; I decided to turn them into underlines.
The Implementation - Phase 1
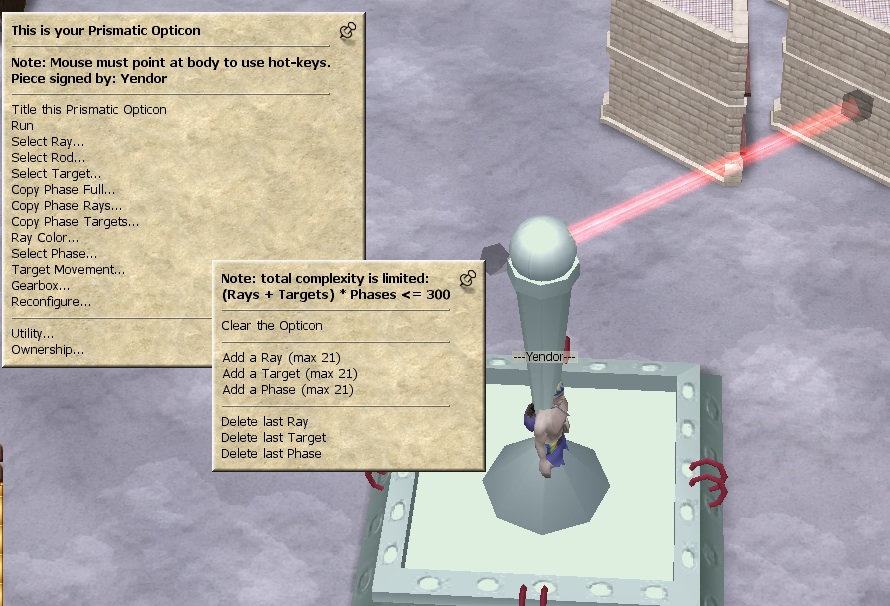
To implement this design, start by pinning the "Reconfigure..." menu. Chose "Add a Target" 21 times and "Add a ray" 5 times, giving us 21 targets (and rods) and 6 rays.
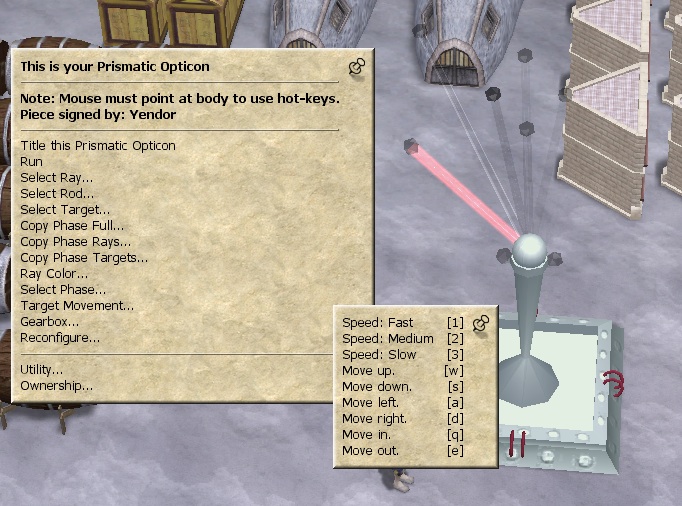
Now begin moving moving the targets into position. Select the rod either by clicking on it or using the "select rod" menu and then pin the "Target movement" menu. Sure it's a little bit confusing to select a rod to use the "Target movement" menu to move the target at the end of the rod, but that's what documentation is for.

The "speed" settings have nothing to do with what the opticron looks like when it runs. So "Distance per click" would be a better label for it -- use Fast for coarse adjustment etc. "Left" and "right" are really "clockwise" and "Counterclockwise". "Up" and "Down" are also rotations; if you keep moving "Up" when the target reaches vertical, it will continue rotating (going down the opposite side). "In" and "Out" adjust the length of the rod, moving the target closer to or furthur away from the Opticron base.
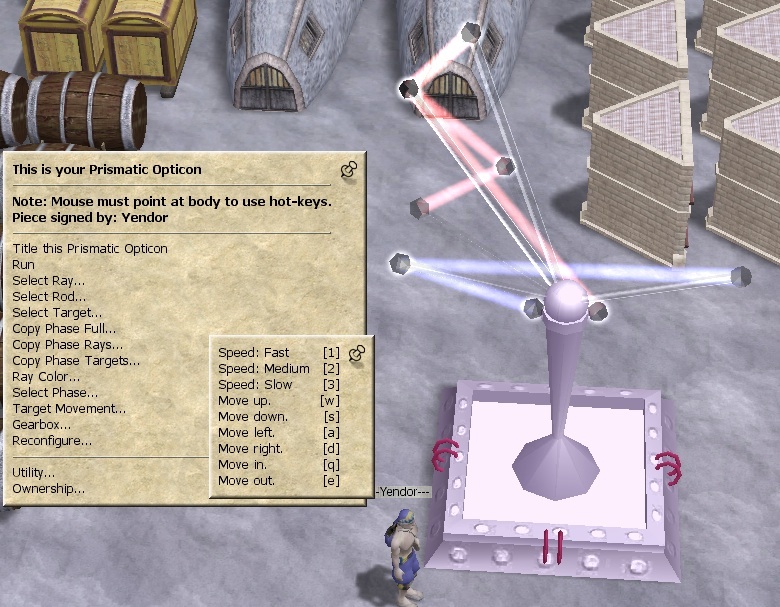
In any event, experient around, selecting other rods, and putting them in position. Be sure to look at all angles to make sure the 3D placement matches your expectation. Since I don't want to pass twice, I built a new Opticon for this tutorial, but then was too lazy to build the whole design, so just did two letters.
Anytime you like, you can adjust the rays. You can use the menu by selecting first a ray, then repeatedly selecting the next target for the ray to visit. For the 'l', the path is ray 1 to target 1 to target 2. For the 'e', the path is ray 2 to target 3 to target 4 to target 5 to target 3 to target 6 to target 7. If you are careful, you can also click on the ray and targets as long as you don't accidentally click a rod. For overlapping targets (5 and 6 in this case), either use the menu or temporarily move them apart, then adjust them back once the ray is programmed.
The "Ray color" menu is hopefully self-explanatory.
The Implementation - Additional Phases
Once you have an idea, and the initial configuration of rays, rods, and targets, you are nearly finished. At this point under the "reconfigure..." menu chose to add a new phase, and then select it under the "Select phase menu".
In most cases, the next thing to do is to choose "Copy phase full". The "Copy Phase" choices change the current phase to match a selected phase. In terms of copying, the source is picked in the "Copy phase" menu, and the destination was already picked in the "Select phase" menu. You can copy the target locations, the ray path, or both.
Now use the same "select rod" "Target movement" etc menus to set up the next phase, and repeat.
Final Touches
When you chose "run", it will tell you what kind of one-output gearbox is needed. This is installed under the "gearbox..." menu.
As is mentioned somewhere else, you can make an almost invisible change to the opticron to reroll the gearbox requirement.
And don't forget to give it a title!