Want to make your own mosaic?
Step 1
Always build to the Oracle complexity, which has the largest number of tiles. This will let you get the kind of detail you need to have a nice mosaic.
Step 2
Use the Editor with tiles in hand (colors will show at the bottom) to randomly cut, rotate (the <- and -> buttons) and place tiles on the board. Keep in mind that the smallest cut will be at least 3 triangles wide/tall. Several shapes will appear over and over, others more rarely. Look on other mosaics to get an idea of what the common shapes are.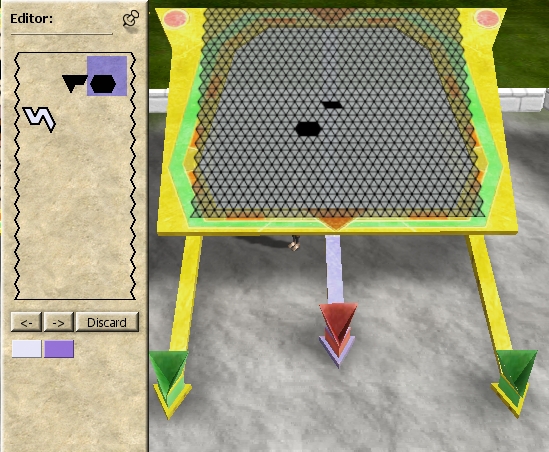
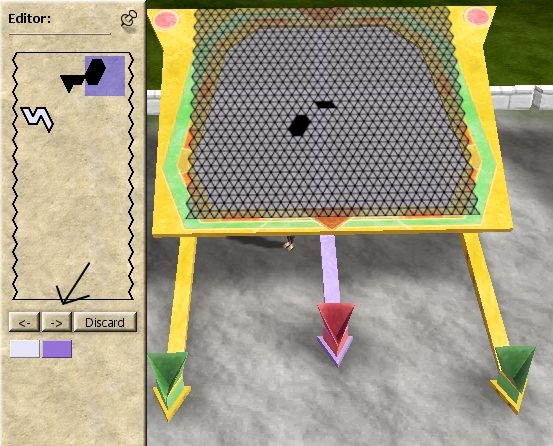
Here is an example of how to rotate a tile
Step 3
Okay, now that we have the basics down, let's talk about planning your mosaic. You will have to plan it in order to do something really interesting. First, find a picture or design you would like to use, such as this:
The best way to work it is with some kind of photo editing software that has layers. Paint.net: http://www.getpaint.net is one such program, and it's free. Here is the blank template blankraelimosaicinlayers.pdn for using with paint.net. If you want to make your own for another program, just use the original blank.jpg and make it a layer. You will then put the picture or design of your choosing as a second layer underneath the first. Reduce to opacity on the first layer to see the second one come through, and you will have an idea how to place your tiles.
Step 4
After you get your picture in layers, start planning how you will execute it using the minimum 3-triangle-per-tile system. You may want to do another layer in between the blank and your picture to experiment with how to best do it.
Step 5
Put in all the tiles, and don't leave any blank spaces. Pay attention to the "borders" of the mosaic, as may of the edge tiles will disappear under the framing. Be patient in finding the right shape to fill the gaps. You will want a stock of about 300 tiles per color, so you have room to throw away a lot that don't fit right.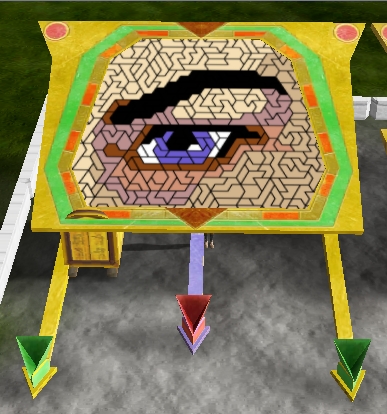