Welcome Island
The goal, after figuring out how to navigate and interact with your character, is to complete the Citizenship test. All the items required are in a large list in the tab entitled Welcome to Egypt. This guide will not explain all of these steps, but rather comment on efficiency and time saving tips along the way.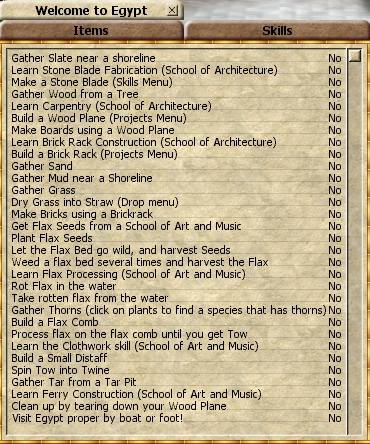
Gathering Resources
Grass, wood, slate, thorns, mud, sand, and tar all require no skills to gather. So, when you first start walking down the path toward civilization, you should keep an eye out for these resources. Take a look at the tips below for maximum foraging efficiency in foraging. Your character can hold 500 items, or 500 weight, which ever comes first. When you start, that is a lot of stuff, so gather nearly everything you come across. Although, since you can grab 100 sand and 100 mud in one swift stroke, go easy on those at first. I'd say 100 of each for now, but you'll plan later...Skills
The few skills you need to master in this section are listed below. There are two paths of skills, the SArch path of construction, and the SArt path of flax. The problem is that you need the SArch skills to build the flax processing facilities, so you pretty much have to learn them in the order presented.- Stone Blade Fabrication - allows you to make a stone blades with 2 pieces of slate under the skills menu. By the time you walk to the SArch, which you should set as your first target, you should have passed by the small lakes and gathered at least a few dozen slate. Look below in foraging for more details on getting slate quickly.
- School & Tuition - SArch, 7 slate
- Notes:
- Stone blades can be fashioned anywhere, as long as you have slate in your inventory. So, when you are in between tasks, or you are making a small queue of tasks, you can add this to the list.
- Since the Carpentry skill requires the blades, you should make your first three stone blades right in front of the SArch when you first learn the skill.
- Your first few tries at making stone blades will probably fail. When this happens, you'll gain levels, but you'll waste slate, so make sure you gather lots of slate to begin the training. I usually set aside at least a dozen if not 2 dozen to complete the first few steps.
- Carpentry - allows you to make wood planes under the projects menu. You can make carpentry shops later with this as well, but not for now.
- School & Tuition - SArch, 3 Stone Blades
- Notes:
- You should be able to get this skill soon after you get the Stone Blade Fabrication skill, since you can stand in the same spot and make your blades for tuition.
- You'll need to plan where to make your wood planes for the best efficiency, but you'll be making a few of them, so stock up on the slate and blades for repairing.
- Brick Rack Construction - allows you to make Brick Racks under the projects menu. These racks are flimsy, and will break over time, so mass producing them is best. Look below under buildings for more info.
- School & Tuition - SArch, 4 Boards
- Notes:
- Since this skill requires boards, which require the wood planes, you'll have to leave the area and build at least 300 feet away from the school. This is where the first major decisions are made. Take a look at the overhead map view using double f8 to see where you'll want to build. Here are a few tips for finding a good location:
- Towards the coast. You'll eventually be making your raft and sailing away, so that will require traveling out to the coast at some point.
- Near good yielding trees. Since you'll need to gather more wood in between other projects, the closer the better.
- Near the road. When you travel back and forth to your new camp, shameful as it is, you don't want to waste time traveling cross country. I started by choosing a nice view up on a hilltop. This was fun the first time, but every time I had to trudge back up the slope across the sand, I regretted the choice more and more.
- Near the lakes. Slate is another main resource to be gathered. Since it pops up a dozen feet or so from the water, you might have the fortunate ability to gather slate without traveling too far out of your way.
- Between or near the schools. 300 Feet is not that far. Don't wander to the other side of the island just because. You need to return to the schools a number of times, so minimize the walking distance.
- Since this skill requires boards, which require the wood planes, you'll have to leave the area and build at least 300 feet away from the school. This is where the first major decisions are made. Take a look at the overhead map view using double f8 to see where you'll want to build. Here are a few tips for finding a good location:
- Flax Processing - allows you to make flax related stuff.
- School & Tuition - SArt, 20 flax
- Notes:
- The 20 flax is only the beginning. You'll need lots of flax to accomplish all the skills and products necessary. When you are growing your flax seeds, you'll need to plant a full spread to create at least a few dozen seeds for later. Since this sad beginning seed only produces 1 flax per seed, you'll have to plant a bunch, and weed a bunch.
- Concerning lag, you may be forced to skip the weeding window and end up with more seeds. I ended with a bunch for that reason, so I tried to keep the flax planting staggered and/or in small groups to avoid one big plot that misses the weeding.
- When planting, you don't have to spread them out to the edge of their graphic, they can actually be as close together as you can step. unfortunately, this makes it especially difficult to catch all the weeding sessions. I find a small plot of 3 x 4 plots, all spaced to the edges of their graphics. This makes it fairly easy to weed and pick without standing around.
- Clothwork - This allows you to make more advanced products from your comb resulting materials.
- School & Tuition - SArt, 20 Rotten flax
- Notes:
- The rotton flax is the main concern here. You have to rot the flax you have been making in the water. There are a few stumbling blocks here, as it is yet another location on your personal menu. This page has lot more information about flax related stuff.
- Since you'll need to make rope, as well as pay tuition, plan to rot at least 26 flax. The last 6 will be processed and divided up between 2 Distaffs to produce the necessary rope.
- Ferry Construction - Allows you to build a ferry and sail to Egypt finally!
- School & Tuition - SArt, 4 Tar
- Notes:
- Gathering the tar: the pit is around the back of the island. It is not on the very coast, so you can cut across the middle of the island as much as the slopes will let you to get as straight of a path as possible. Don't make this run until your distaffs are working!
- Building the Ferry: your final accomplishment. This requires nearly everything to be complete, so you'll tackle this last, once you have all your machinery working and resources gathered. Find the nearest spot on the shore to make your ferry, and make sure you bring all your materials with you. Check buildings for more detail on the requirements.
Buildings
This is a quick rundown of the basic construction related things you'll need to do. Not all of them are buildings necessarily, but they fit into this category regardless. This section overlaps with buildings below, but this is more of a chronological layout than just tips.- Wood plane - turns wood into boards
- Requires carpentry, 4 slate, 1 stone blade.
- Notes:
- Because it requires 1 stone blade, that makes at least 6 slate for every plane. When you first get the carpentry skill, you should have been collecting as much slate and wood on your way over, so you should have enough to start a few. I would recommend using all of your slate to make as many (up to 5) wood planes as you can. Arrange these wood planes into a 'house' shape if you're looking down on yourself (using doubkle f8). This way you can click on each one in series and not have to wait for any graphical timing (see below).
- Your wood planes will break a lot (every 10-20 boards or so), so you have to have plenty of stone blades handy to repair them. Usually I will wait until a few have broken before stopping the wood planing and switching to repair mode, but don't let yourself get down to 1 or even 2 planes, as you will be waiting and wasting time. Although, then you could be making stone blades during that time, since you pinned that skill, didn't you?
- Brick Rack - technically called a 'flimsy' brickrack for now, since you can eventually make a stronger one when you have more skills in Egypt.
- Requires: 4 boards
- Notes:
- - At 4 boards, if you make a whole spread of racks to build in bulk, which I recommend, then it will take at least 32 boards, if not up to 60. That's a lot of wood, and will inevitably require a lot of stone blades, so plan ahead by gathering all the necessary materials ahead of time.
- - Do not pick up the racks until you are completely finished with them. Because they are flimsy, they will break, and therefore be worthless. I usually just keep using them until they dissapear and leave a pile of bricks behind.
- Flax Comb - The first basic processing facility for flax. You only need one, since it caues an Endurance timer between uses.
- Requires: 18 Boards, 36 Bricks, 60 Thorns
- Notes:
- - Notice the 60 thorns. Not really that many since you can collect them in bulk from the bushes, but if you forget to gather thorns when you're out and about, then if your comb breaks, you'll be up a creek (not really an issue until you're in Egypt).
- - Because there are three steps to the flax processing, make sure you know which steps you're interested in. For welcome island, you only need the resource of Tow for your rope, at step 2, so don't waste time doing step 3, besides, your comb will last longer.
- - Make sure you have at least 10 rotten flax in your inventory before starting, because the timer does not change, even if you use only 1 rotten flax.
- Distaff - technically a 'small' distaff, but this is the necessary equipment to complete your rope fabrication. These work on their own, with no Endurance timer, so you can make multiples to do faster work for you.
- Requires:12 boards, 100 bricks, 10 wood
- Notes:
- - Taking note of the 100 brick requirement, this seems like a great deal of resources to make two of, but considering the length of time to spin the tow into twine, then the twine into rope, you can make another distaff and have it running in less overall time than waiting for one. It usues lots more resources, granted, but it is the time we are concerned about here.
- - Distaffs can hold tons of material (relative to what we are working on), and will work for a long time on their own. Since we're going for speed instead of bulk, we only need to load each of the distaffs with a few tow, but they will work faster side by side.
- Ferry Boat - the final goal of Citizenship. You have to build this on coast water, not the inner lakes, so make sure you find a spot that connects to the main water body. For Welcome Island, there are a few inlets that connect and are pretty close to the center of town, so try those.
- Requires:20 Boards, 20 Wood, 4 Tar, 4 Rope, 1 Sail
- Notes:
- - The ferry requires some basic materials, but the rope is the main issue. Notice also that this requires boards and wood, so don't plane all of your wood into boards, or you'll be kicking yourself all the way to the next bunch of trees.
- - If you're making all this stuff in one session, then you can drop your tar as you make your other materials, but if not, then the tar will weigh you down with your other materials. You may want to build the ferry first, then go back and load up on all of your transportation materials.
Materials
- grass - you'll need plenty for the straw after drying, so pick grass whenever you stop to do anything else.
- straw - dry your grass when you are doing other things, or when waiting for your Endurance timer to reset. try groups of about 5, and make 4 or 5 piles to be most efficient. use smaller piles if necessary so you never wait for them. Larger groups for longer working periods.
- sand - only pick this up when you know you are going to be making bricks soon, since you're bound to gather 100 each time for efficiency.
- mud - similar to sand, gather only when you intend on making bricks soon. You'll need 3 times as much mud as sand, so don't gather the same, or you'll always end up with too much sand.
- slate - gather all you come across. You'll always need more, and you can carry it to Egypt, so always stop and pick this up when you run over it.
- stone blades - You'll need tons of these in the beginning both here and in Egypt, until you can craft better carpentry blades. Plan on making some of these everytime you have down time, or are gueuing tasks. Pin this menu, since it stays the same.
- wood - gather tons of wood whenever you are near trees. Don't stray too far from your target path unless it is a heavy load of good wood producing trees. Error on the side of carrying too much wood, since you can always drop it if you need something more valuable, but if you can't find trees when you need them, you'll regret it.
- boards - Only use up your wood when you know you have a purpose, since you'll need wood too. Boards are easy to come by, given the wood, so only stock up when needed.
- tar - Only need 4 for the ferry, so only gather what's necessary.
Planning for Egypt
Mainly this section is to help explain and prepare your character for the mainland. Stock up on a few essential resources here on Welcome Island before you sail to Egypt to save tons of time. Resources are much easier to come by here on welcome Island than in Egypt, so gathering as much as possible here and taking it with you is a must. Bricks and boards are paramount, since you will need both for the initial SArch test of Compound construction. 100 Boards and 200 Bricks are necessary for your first tuition. You don't want to start from scratch again if you don't have to, so use the resources you have now to prepare. Those two resources make for 300 items in your inventory, so the remaining 200 need to be used wisely. You'll need way more of both to finish your compound, so don't worry about taking enough to finish the compound, but there are some more skill you can pay for immediately, they are:- carving, which requires 100 wood, from SBody
- kiln construction, which requires 20 bricks, from SThought.
So, when you finish your ferry and get all of your materials together, it is time to go to Egypt.
When you click on your ferry and choose to sail to Egypt, you are given a panel of the many places you can travel. Do the following:
- Take a screenshot of the options panel and log out.
- Look at the atlas and compare the destination coordinates presented to figure out where you'd like to start. Certainly, you won't have perfect knowledge of the region, but it will get you started to decide which main area from which to start. Read up on the different research levels of a given city here, or specifically the research status of all cities
- Decide if you want to join a major city and get lots of free techs but having less impact, or joining a small village and be able to help much more with research.