Glassblowing
Overview of the process
 |
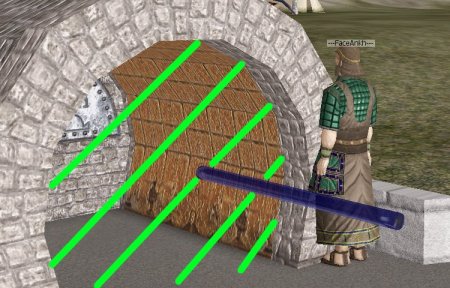
| Green lines indicate approximate position of the heating plane |
When you begin a glassblowing project, you have a (blue) rod of glass hovering just outside the glory hole. You can push the rod in and out of the glory hole with the S and A hotkeys (or the menu if you're an amazingly fast clicker).
The rod will heat up the rod at a specific point in the glory hole (a plane just behind the grey bricks, indicated by the (edited in) green lines in the picture). As the rod gets hotter, it goes black -> dull red -> red -> orange -> yellow. Heat spreads along the rod a short distance. When a piece of the rod is not in the heating plane it will gradually cool.
Every tick (approximately 1 second), heat will be recalculated (increasing at the heating plane, spreading from hotter parts and decreasing away from the heating plane) and the rod may droop (deform and move towards the ground). Hotter parts of the rod will droop more than cooler parts. You can spin the rod with the N and M hotkeys. Generally people keep a constant rotation going so that every time the rod droops down it will have been rotated roughly 180 degrees by the next heat tick and will drop back into the correct place.
At any time, you may blow into the tube (B hotkey) and the rod will expand. Hotter parts of the rod will expand more than cooler parts, which allows you to make different shapes at different parts of the rod, dependent on the heat you've allowed there. Blowing too much (about 10 times) will cause the glass to shatter and abort the project.
After approximately 60 seconds, the glass is frozen in whatever shape (and heat) it got to and the project is completed. This is a good time to rotate it around and compare it to the goal shape to see how you can improve. When you're ready, unload (U hotkey) the project and it will be put in your inventory.
You can check the quality of the item at any time by pressing the Q hotkey and can also unload it midway through the process if you wish to freeze it at a particular quality or stop early. Be warned that quality changes quickly - you may get a different quality between pressing Q (quality check) and U (unload) so make sure you have a margin of error if you do this.
General advice
What you need most of all to become successful at glassblowing is practice. So prepare to waste a lot of valuable resources before getting any acceptable results. See it as an investment in the future and try to ignore the pains you went through while making potash and working on the glazier's bench. If you have the slightest talent for glass blowing you will see the quality of your work become better and better over time. See that as a success, be happy about it and don't aim for those 8000+ wine glasses right from the start. The curve won't go constantly up; there will be failures in between. Try to accept them, analyze what you did wrong and try to do better next time.
The cheapest project to experiment on is a wine glass - do several of these to get the general idea of glassblowing before you try one of the more expensive/difficult projects.
The second thing you need when working with the Glory Hole is good nerves. Make sure you are relaxed before you start, plan ahead before you even load that next glass rod and don't panic if you make a mistake (like hitting the wrong hotkey) - instead continue working as you normally would have.
The main problem with the glory hole is that you have limited time, so you need to be quick too (if you experience lag you should generally stay away from it). There have been reports that you have 60 seconds and I believe the timer starts as soon as you start interacting with the glory hole after loading material into it. Displaying the goal might be an exception though. (Can anyone confirm this?) Once that time is up you can still move the item around but it will no longer change shape. This is a good moment to take a good look at the goal again, compare it with what you made and analyze your mistakes.
What makes everything so difficult is that there is so many things you need to pay attention to, quick decisions to be made and keys to press. So consider doing all this with 2 people. For example one turning, the other pushing, pulling and blowing (for wine glasses and thermometers) or one pushing and pulling and the other turning and blowing (for distillation coils). Nothing can beat a good team here, but make sure to practice together.
You might even want a 3rd person constantly checking quality and quickly unloading once the desired quality has been reached. This is especially useful for thermometers. With wineglasses it's a tough decision when to unload, since quality can change dramatically while turning it towards the end and usually you only know what would have been the peak once it's already too late. For distillation coils it might be wise to wait until the timer is up since quality depends a lot on rotation angle here, so a quality 0 item might turn out to be a quality 8000+ item after all.
Well, glass blowing sure isn't for everyone. If you don't enjoy it leave it to others who are crazy enough to go through all these pains. There are several people getting good at it already and I'm sure they will offer to make your items if you provide the raw materials (and a little extra fee for the trouble). But keep in mind that even the best will fail every now and then, so make sure to bring some extra resources. It's also a good chance to watch how they do it and might be the best thing to do before you try it yourself. The guides here on the Wiki might be a good start, but not much more.
The options available for the tools on the Glory Hole are:
- Goal Display [G]
- Blow into tube [B]
- Quality Check [Q]
- Discard [D]
- Rotate Left [N]
- Rotate Right [M]
- Push the blowpipe [S]
- Pull the blowpipe [A]
- Unload [U]
Specific guides
Making a Distillation Coil
Requires 1 glass pipe to make.
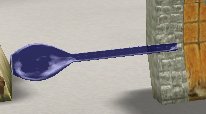
Goal display, and example of a 7707 quality finished coil:


My strategy is to basically A, *pause*, N, N, A, *pause*, N N over and over...looks pretty serviable to me at least. The pausing lets the glass drop a little bit and then the rotating helps create the loops.
It seems that simply rotating it with the method described above gives you a nearly perfect coil, but it takes too much time. Once the coil is complete there is no time to cool it so that you can expand the bulb without ruining the coil. I have been getting 3.4 - 4.8K quality by ignoring the bulb and focusing on making the three loops in the coil, but I am stuck on that part.
Essentially that's the method I've been using. I let a part droop once or twice, then push it in once, rotate it so the freshly drooped part is roughly horizontal, and repeat. It takes practice to get a feel for it, and even once you do, there's a good chance you will end up with a bad coil anyway. The bulb you kind of have to ignore, but it's OK since it's a smaller part than the coil. You'll need a lot of luck and persistance if you want to pull off the 6-6.5k and up range. -Knives
I have also noticed that, once the timer is up, pushing or pulling the coil affects the quality. If you rotate the coild down to zero quality, push or pull it a few times, then rotate it back to its max, you can possibly gain as much as 250 quality. In this way I was able to change a few high 3K to low 4K quality coils. - Tenzek
Making a Thermometer
Goal display from Rehpic:
Requires 1 glass pipe and 1 quicksilver to make.
Must be 3500 quality in order to count as a thermometer, though quality isn't tagged on the final product so anything above 3500 will yield a thermometer.
A dubious Thermo Guide (with pictures).
Making a Barometric Sphere
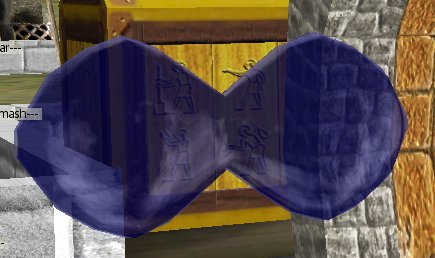
Goal display:
Requires 1 glass rod to make. You must be signed up for the Test of Life to get the option.
Push the rod in about 4 clicks to heat the spot where the middle of the first bulb will be. Leave it for a few seconds until the middle of the bulb location is yellow, then quickly push the rod in to heat the centre of the second bulb. As soon as it's yellow, blow 5-10 times (not counted yet) to get two rough bulbs. It seems to help to leave the first bulb to heat slightly longer than the second to counter the cool down time while you're heating the second. I got spheres of 5-6k with this method.
You need 3 Barometric Spheres to make a Barometer. The ideal case is for the 3 spheres to be perfectly matched in quality (otherwise you lose quality on the barometer - see barometer page for the reason) and the easiest way to achieve that is to make lots of spheres, then pick the closest matched ones.
Making a Hookah Bowl
Goal display from Monthar:
Requires 1 fine glass rod to make. You must have The Art of the Pipe skill.
Here's a quick and dirty guide to making hookah bowls based on my very limited experience.
Pull the rod ('a') 5 times fast at the start. Let it get yellow. Rotate a bit so it doesn't sag too far (hit 'm' about 8 times fast or so). Once it's good and yellow, hammer down the 'a' key 16 times to get it to the other end of the rod, ignoring sag. After the 16th 'a', rotate half way until the far end straightens out again (about 7 or 8 'm's). When the near end glows yellow, blow ('b') 9 times. Rotate a bit to straighten it out. I end up with about 5700 quality. -Matk
Making a Wine Glass
Requires 1 fine glass rod to make.
Here is a guide to making wine glasses using the Glory Hole. As of this writing I'm able to consistently make 7k quality glasses with a decent shot at 8k.
I like to use the F5 camera and position myself a couple feet inside the structure with the camera positiond on the other side so that I can see a couple of feet outside the structure as well. This gives a good view of the grey front edge of the Glory Hole which is the hotspot used to heat the glass as well as most of the inside where you will perform the final shaping.
When performing the initial heating, it's important to keep the glass spinning at a fairly constant rate. I've found that about two turns per heat tick (~1 sec) seems to work fairly well.
First you want to form the base. Move the rod in 1 click and let it heat up to yellow. Blow once and move it in one more click. When it gets yellow, blow twice. That's it for the base.
Immediately push the rod in so that the other end (what will become the mouth of the glass) is just inside the grey hotspot. Heat it up yellow and then proceed to pull the rod out and heat up 4 more sections of the rod to yellow. Move the rod back in a bit to keep the center 3 sections yellow and let the section on either side fade more to red (the mouth end will likely have already done so). Then push the rod all the way into the structure and blow 5 times.
That's it for blowing. You now rotate the glass so that anything that has sagged is now above the axis of rotation. Let it sit there until gravity pulls it closer to where it needs to be. During this stage I find it handy to check the quality frequently as I rotate it or let sag. Often you will see the quality go up as the piece droops closer to the goal and then go down as it droops past. Just rotate it above again and that should help. When you are satisfied with the quality (or time has run out), unload your beautiful new wine glass and prepare to experience faster Oenology point gain.
Don't be afraid to unload the piece before the full 60 second work time has expired. I've seen the quality of pieces drop dramatically.
- Shinjin
Note: Wineglasses (likely all glassblowing products) cannot be named if over 9500 quality, unlike blacksmithing.
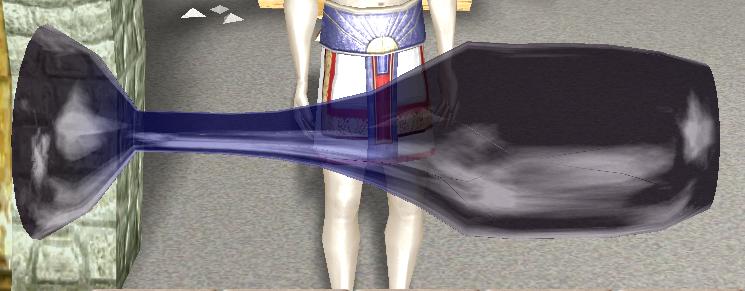
Example of a Quality 9308 Wine Glass from Pheanor-Re


